Article Date: 12the December 2012
The instructions that follow assume that you have downloaded the Windows 7 software from e-academy and have already burned the IMG file you received to a DVD. If you have not already burned the IMG file, see How to Burn an IMG File.
This section covers the following areas:
Pre-Installation Information
Important: You need to prepare your computer before initiating the installation of the Windows 7. Since you are installing a completely new operating system, all programs that are currently on your computer will be deleted.
Back up all of your all your files and folders onto an external source such as a DVD, CD, Jump Drive, External Hard Drive, Thumb Drive or USB Drive. If you have a second partition of your hard drive, you can copy and paste your data to this partition including any previously downloaded software from e-academy.
Make a note of all your install files for any programs on your computer such as programs downloaded and paid for from the internet. CD/DVD installation programs (IE Office, Project Professional) and the licenses for these products such as license keys, serial numbers, activation codes and product keys. These programs will need to be reinstalled later.
If you are using an external device to back up your files, disconnect the device.
Installing Windows 7
You need to have at least 10GB to install. Check the properties of the C Drive to make sure you have enough space before you begin.
Place the DVD with the burned IMG file on it into the DVD drive.
Click Start.
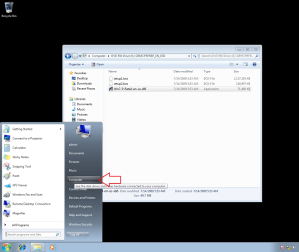
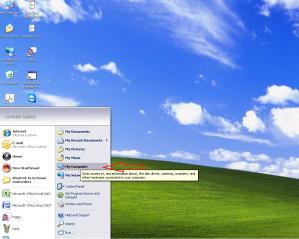
If you are running Vista, click Computer. If you are running XP, click My Computer.
Double click your DVD drive (it is frequently DVD Drive (E:)).
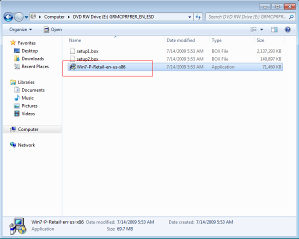
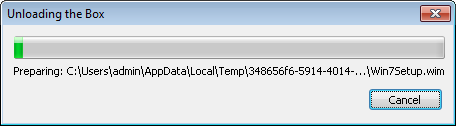
There are three files listed. Select the Win7-P-Retail-en-us-x86/64. (86 indicates 32-bit) file. The unloading of the files begins. Note: This process may take up to 15 minutes.
<
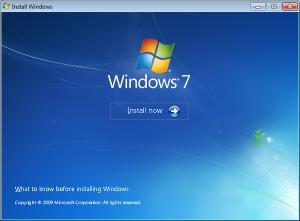
When the unloading phase is complete, the Install Windows window is displayed. Click the arrow beside Install now.
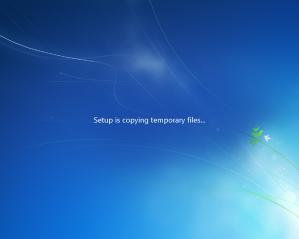
The message Setup is copying temporary files…is displayed.
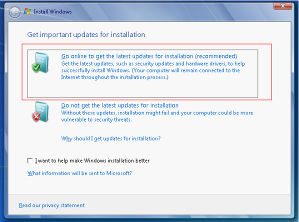
On the Get important updates for installation window, select Go online…
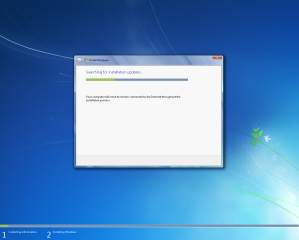
The Searching for installation updates window is displayed.
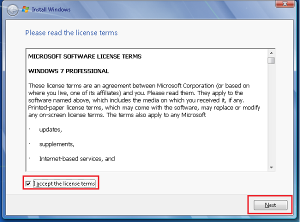
Click the I accept the license terms check box.
Click Next.
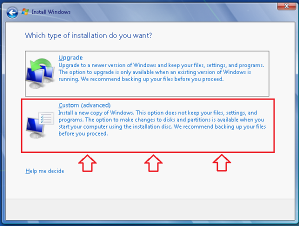
Note: Because you have a Windows version that is not eligible for upgrade, you will need to do a custom installation.
Click Custom (advanced).
Click Disk 0 Partition 1(C:). Note: You must have at least 10GB of space available to do a custom installation of Windows 7.
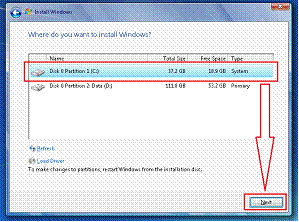
Click Next. The Install Windows program displays a warning that previous Windows programs may not be accessible.
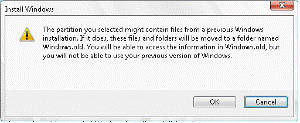
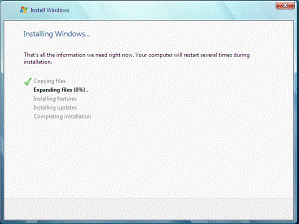
Click OK. The Installing Windows window is displayed.
Setting up Windows 7
After the installation is complete, you will need to setup Windows 7.
Set up Windows updates.
Set up the computer name with the first user account.
Input the date and time including time zone.
Choose the network type the computer is located on.
Post Installation Information
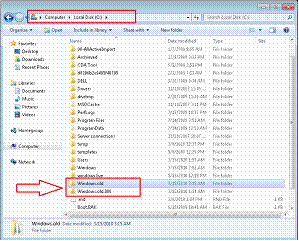
Note: If there were any files left on your hard drive before you started the installation process, they will be found in C:\Windows.old. You will need to reinstall all your previous programs.
To install your key and activate windows:
Click Start.
Right click on Computer. A pop-up menu is displayed.
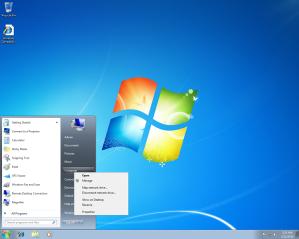
Click Properties. The properties of Windows 7 are displayed.
At the bottom of the screen, beside Product ID, click Change product key. The Windows Activation window is displayed.
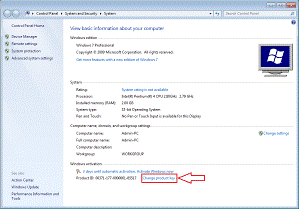
Beside Product Key:, enter the new product key in the text box.
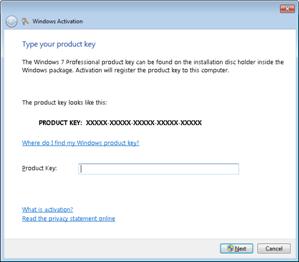
Click Next. A confirmation window is displayed.
Close the confirmation window.
Your system is now ready to be used.